We’re diving into one of the most fascinating advancements in the world of image super-resolution: Chain of Zoom (CoZ). This revolutionary framework takes existing super-resolution (SR) models and enables them to zoom far beyond their training limits — even up to 256x magnification — with stunning results.
Let’s unpack what makes this model so special, how to install it, and see it in action with some real-world tests.
What is Chain of Zoom?
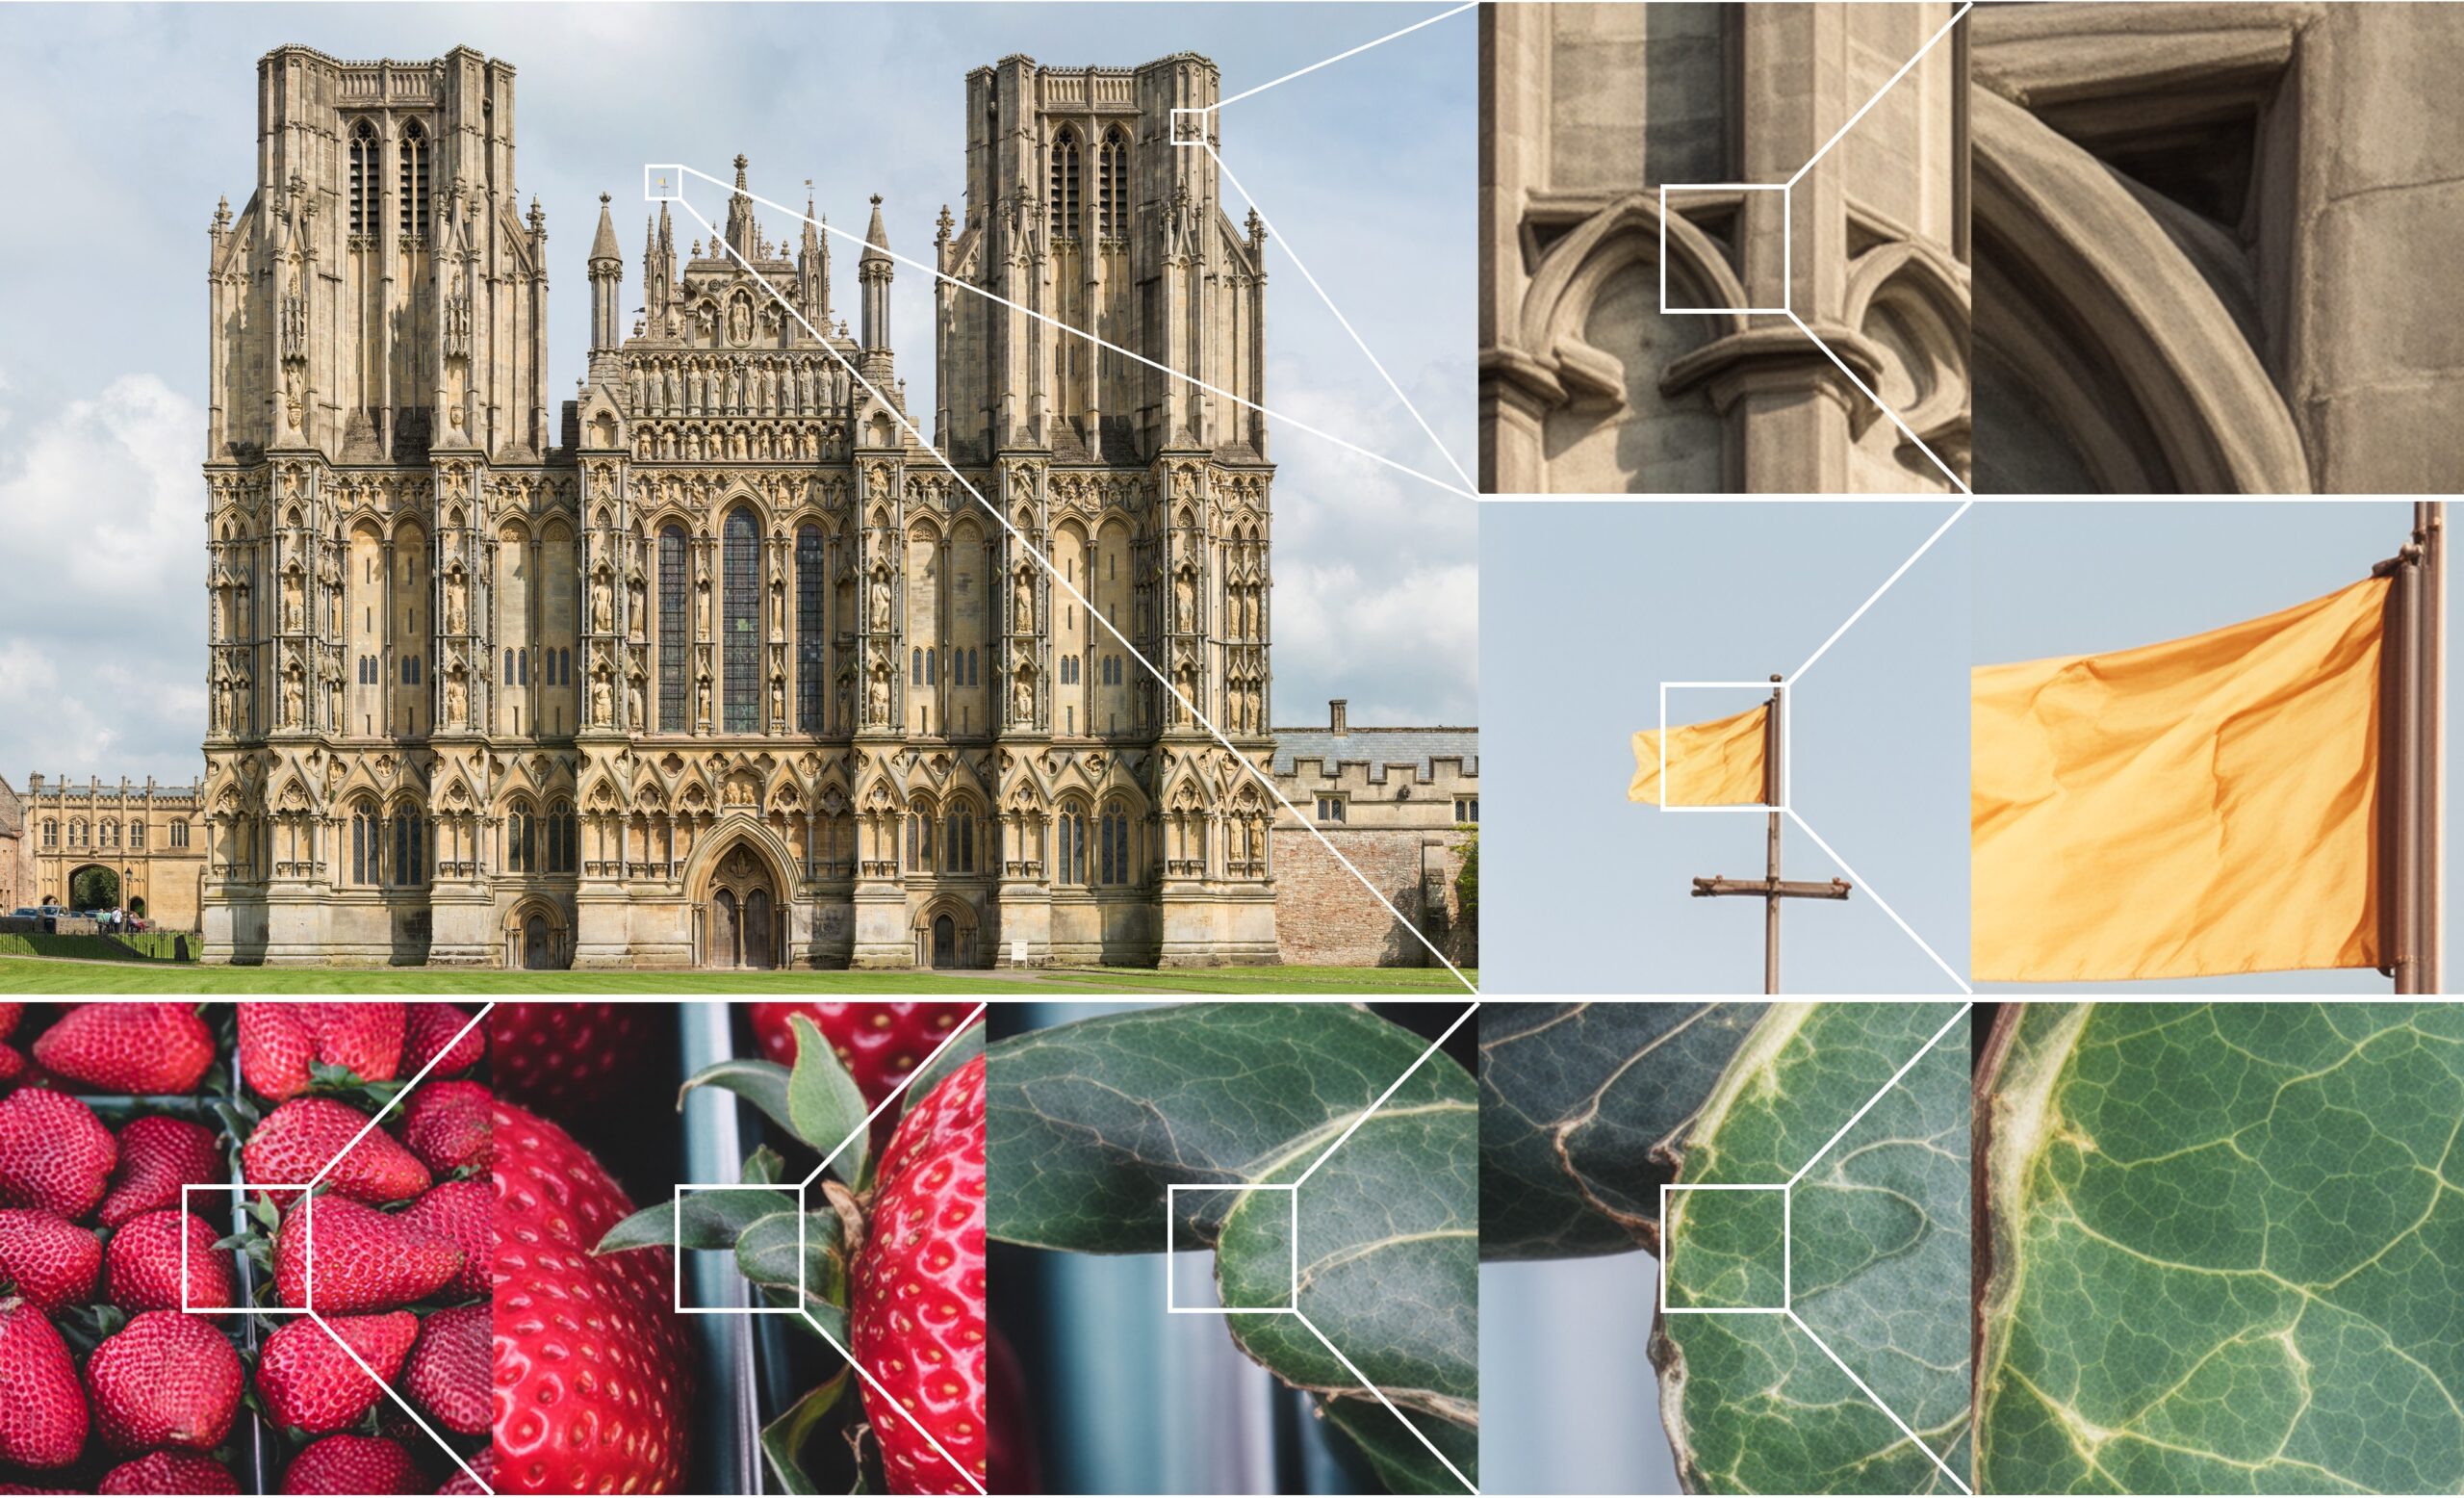
Chain of Zoom reimagines how super-resolution is traditionally approached. Rather than taking a single leap from a small 64×64 image to a massive 16,000×16,000 resolution, it decomposes the task into an autoregressive chain of manageable zoom steps.
Each step applies a standard 4x SR model, but the key innovation is how the zoom is progressively chained, maintaining stability and quality at every level.
Key Features:
- Extreme Magnification: Up to 256x zoom from low-res inputs.
- Auto-regressive Zoom Chaining: Multi-step resolution scaling.
- Multiscale-Aware Text Prompts: Guided by a vision-language model (VLM).
- Semantic-Aware Enhancement: Fine-tuned VLM helps guide zoom intelligently.
- GRPO Reinforcement Learning: Used to align prompt generation with human preference.
- GPU Acceleration: Utilizes CUDA and high VRAM (tested with 48GB RTX 6000).
Installing Chain of Zoom
Here are the installation steps for setting up and running the Chain-of-Zoom (CoZ) extreme super-resolution framework:
Prerequisites
Ensure you have the following:
- Ubuntu/Linux system (Windows with WSL also works)
- Python 3.10
- NVIDIA GPU with at least 24GB VRAM (recommended: RTX A6000 / 3090 / 4090)
- Miniconda or Anaconda
🔧 Installation Steps
1. Clone the Chain-of-Zoom Repository
git clone https://github.com/bryanswkim/Chain-of-Zoom.git
cd Chain-of-Zoom
2. Create a Virtual Environment
Using Conda:
conda create -n coz python=3.10 -y
conda activate coz
3. Install Required Dependencies
pip install -r requirements.txt
This step will install PyTorch, diffusers, transformers, and other required packages.
4. Download Pretrained Model Checkpoints
You’ll need the following checkpoints. Download them manually or let the script handle it during the first run.
| Model | Source |
|---|---|
| Stable Diffusion v3 | Hugging Face |
| Qwen2.5-VL-3B-Instruct | Hugging Face |
| RAM + DAPE | Hugging Face |
| VAE & LoRA weights | Provided in /ckpt folder |
📁 Place all checkpoints in the appropriate folders inside the
ckpt/directory.
5. Run an Inference Example
python inference_coz.py \
  -i samples \
  -o inference_results/coz_vlmprompt \
  --rec_type recursive_multiscale \
  --prompt_type vlm \
  --lora_path ckpt/SR_LoRA/model_20001.pkl \
  --vae_path ckpt/SR_VAE/vae_encoder_20001.pt \
  --pretrained_model_name_or_path 'stabilityai/stable-diffusion-3-medium-diffusers' \
  --ram_ft_path ckpt/DAPE/DAPE.pth \
  --ram_path ckpt/RAM/ram_swin_large_14m.pth
This will take a sample image, progressively zoom it using the CoZ pipeline, and save results in inference_results/coz_vlmprompt/.
Tips
- Use the
--efficient_memoryflag to reduce VRAM usage (runs on 24GB), though this increases inference time. - For optimal speed, it’s recommended to use two GPUs.
Live Demo & Testing
Test 1: Default Image

We started with a sample image bundled with the project. After a few seconds of model loading and processing, we saw a beautifully zoomed-in sequence — going step-by-step deeper into the image. Impressive fidelity, even at extreme scales.
Test 2: St. Stephen’s Cathedral, Vienna
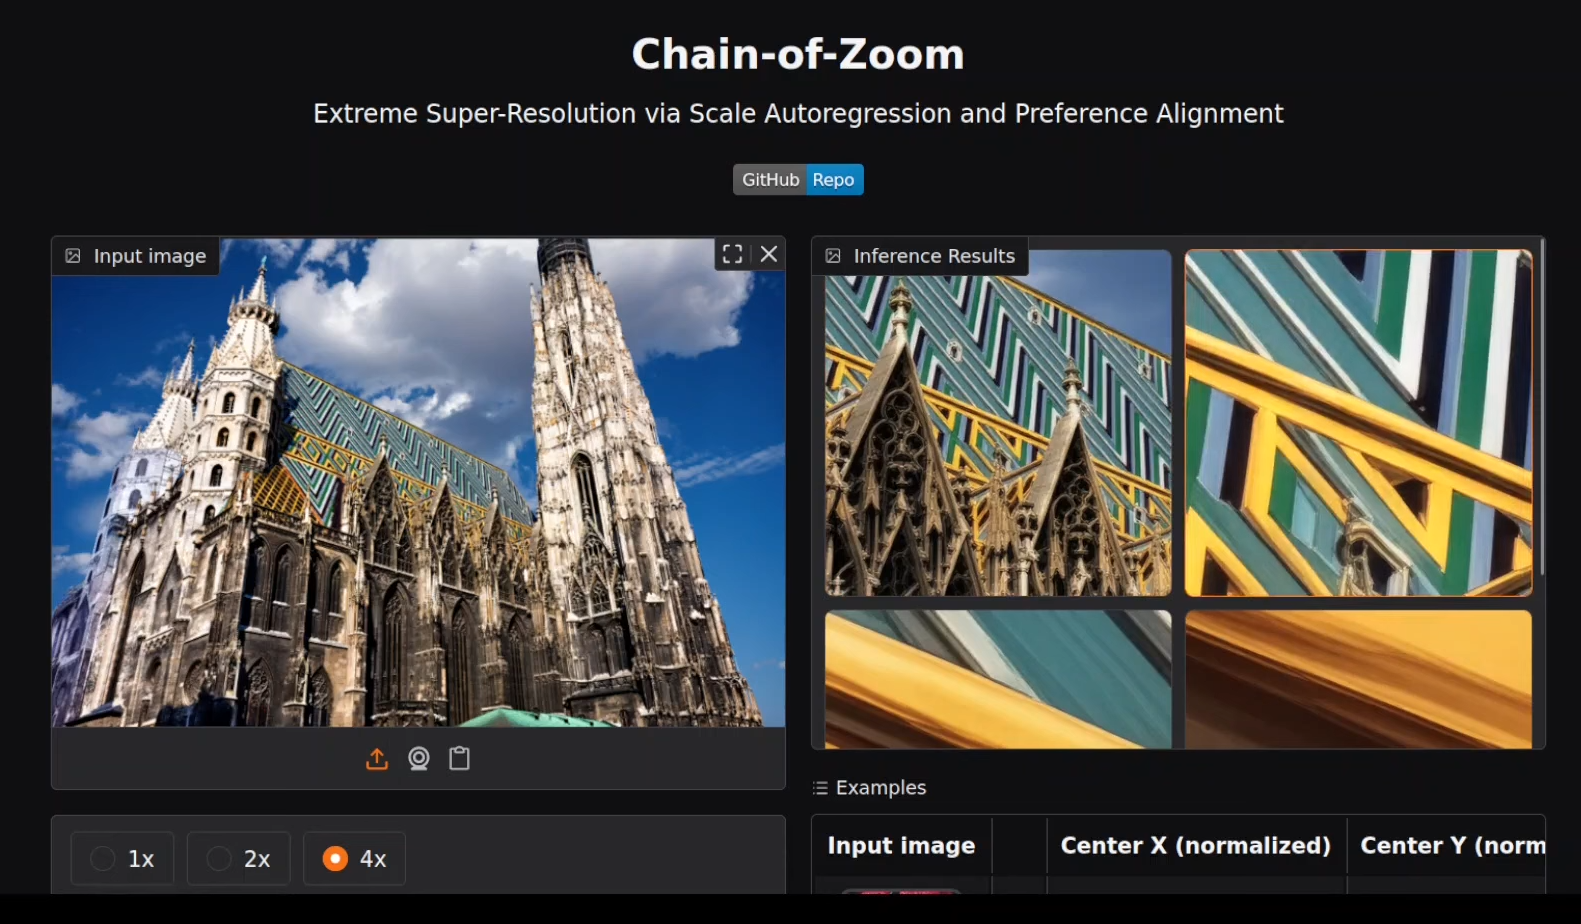
This majestic building was zoomed in up to 4 levels. The details of the spires and intricate architecture stood out sharply. This test consumed over 31 GB of VRAM, so be sure your GPU is ready!
Test 3: Blurry Image
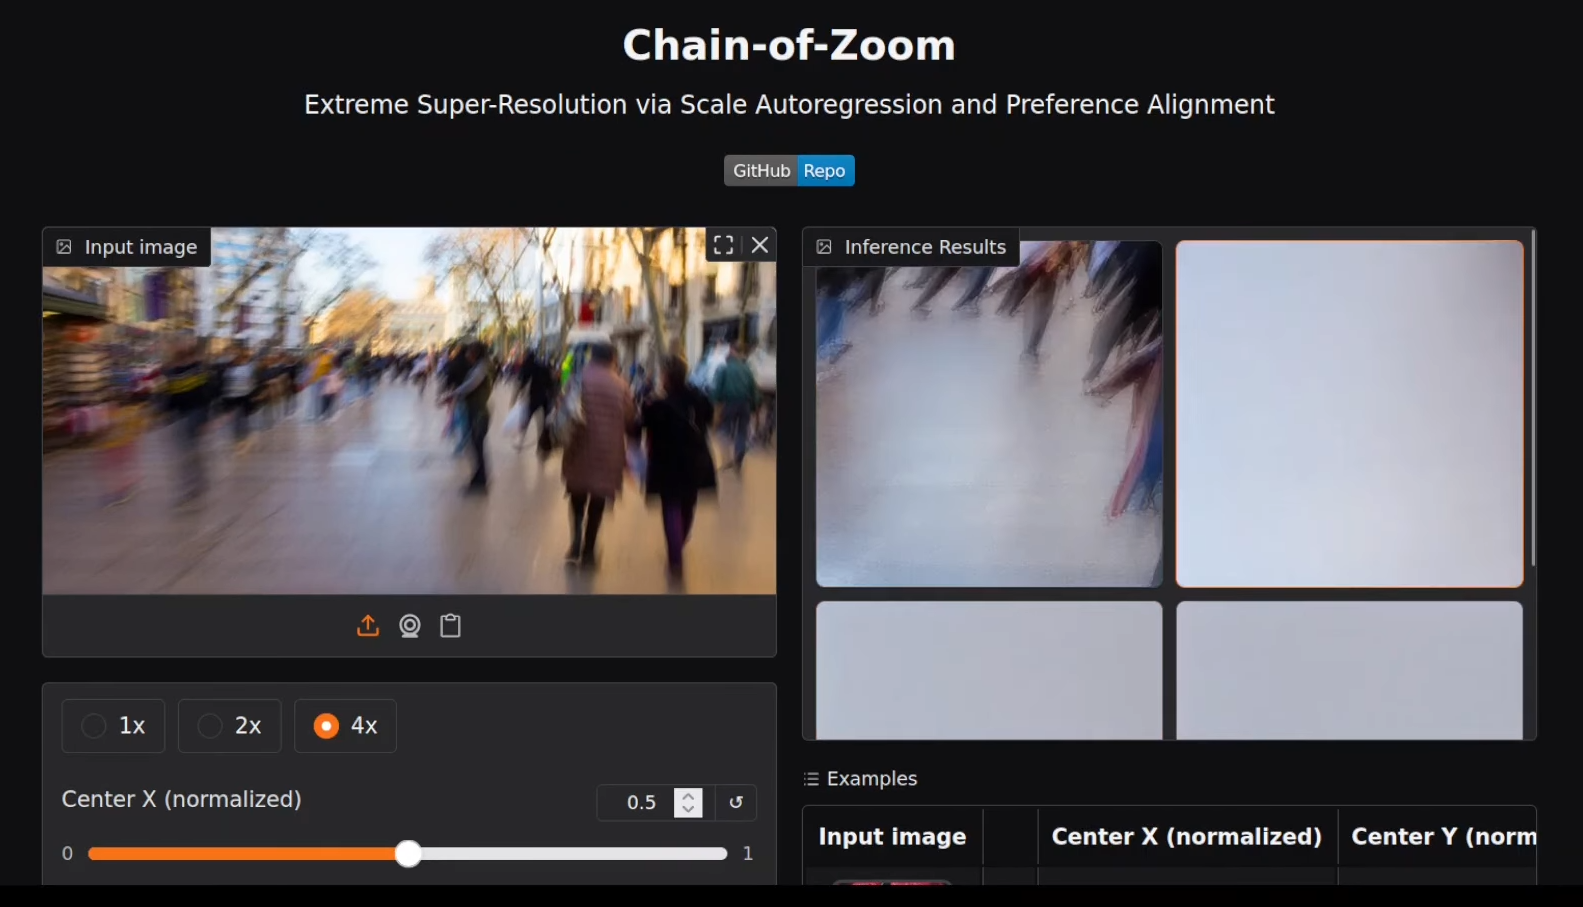
As expected, trying to enhance an inherently blurry image didn’t produce great results. The system can’t invent what’s not there — but it handled the input gracefully.
Test 4: Black & White Image

The zoom quality remained very high, despite the lack of color. This shows CoZ’s semantic guidance capability, driven by its VLM.
Test 5: Focused Area (Birds)
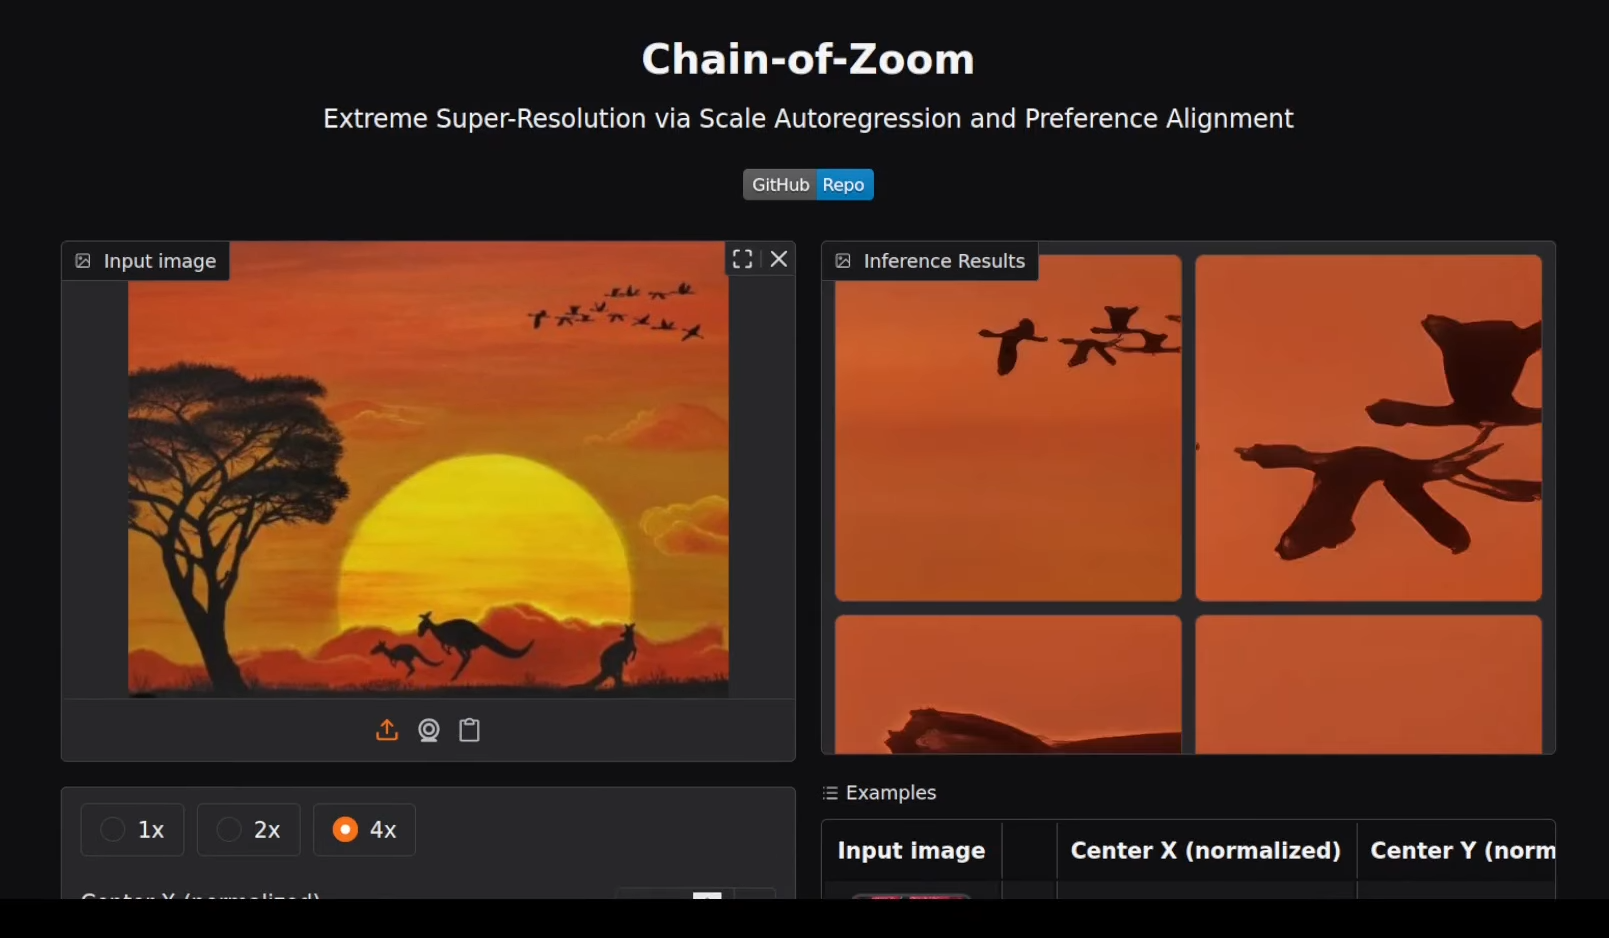
We manually zoomed into birds in an image — results were crisp and contextually accurate.
Behind the Scenes: Architecture Breakdown
At extreme zoom levels, original low-res images lack meaningful details. To overcome this, Chain of Zoom uses multiscale-aware text prompts generated by a fine-tuned Vision Language Model (VLM).
These prompts guide the image enhancement with semantic context — helping the system “understand” what should appear at each zoom level. Prompt quality is optimized using a reinforcement learning framework called GRPO, similar to what DeepSeek uses, aligning generations with human preferences.
Final Thoughts
Chain of Zoom is truly next-level super resolution AI. By combining autoregressive zoom chaining with semantic guidance from language models, it breaks the traditional limits of image enhancement. Whether you’re zooming into historical architecture, analyzing documents, or enhancing blurry surveillance frames, this tool is packed with potential.
⚠️ Note: You’ll need a high-end GPU (30+ GB VRAM recommended) for smooth performance.